
Wood Burner Installation, Wood Burning Stoves
Ultimate Guide to Roof Penetrations & Flashings for Log Burner Flues
01
Nov
Nov
The Ultimate Guide to Roof Penetrations and Flashings for Log Burner Flues
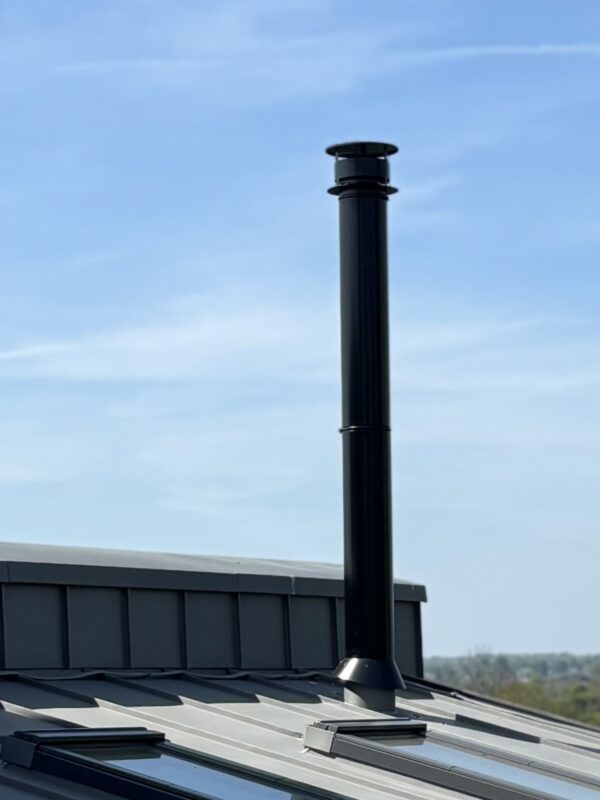
Planning a roof penetration and flashing for a log burner flue requires precision. The right flashing system prevents leaks, allows thermal movement, and ensures long-term fire safety. In this guide, we’ll explain how to select, install, and maintain roof penetrations and flashings across every roof type — from tile and slate to corrugated and felt systems.
1) Why Roof Penetrations and Flashings Matter
Any opening through a roof — whether for a log burner flue, vent, or chimney — is a potential leak point. Correctly detailing roof penetrations and flashings ensures weatherproofing, structural longevity, and compliance with building regulations.
- They prevent moisture ingress and structural decay.
- They allow movement where the flue expands or contracts.
- They integrate the flue with tiles, slates, or sheet profiles.
At Hot Box® Stoves, we supply flashing kits and components designed specifically for stove and chimney systems — available in lead, EPDM, and silicone.
2) Flashing Materials for Roof Penetrations
Different roofs require different materials. Choosing between lead, EPDM, and silicone flashings depends on roof type, temperature range, and budget.
Lead Flashings
Lead is traditional, durable, and ideal for tiled or slated roofs. Use it for aprons, step flashings, soakers, and back gutters.
EPDM Flashings
EPDM is flexible, easy to install, and perfect for most flue penetrations where heat is moderate.
Silicone Flashings
Silicone handles extreme heat and is suited for log burner flues, pizza ovens, and metal chimneys.
3) Roof Penetrations by Roof Type
Tile Roofs
Use lead aprons and step flashings with trays or back gutters. Pair with EPDM or silicone boots for round flues.
Tile Roof FlashingsSlate Roofs
Combine lead aprons, soakers, and saddles for a watertight finish. Add flexible boots for pipe penetrations.
Slate Roof FlashingsCorrugated Roofs
Choose contoured bases that seal to metal profiles. Use EPDM for normal temperatures or silicone for hot flues.
Corrugated FlashingsFelt Roofs
Use malleable flat bases and ensure sealant compatibility with the membrane type.
Felt Roof Flashings4) Detailing and Sequencing Flashings
When detailing roof penetrations and flashings for a log burner flue, follow a logical order that promotes positive water flow.
- Install underlay or membrane first, ensuring correct laps.
- Fit the lower apron flashing below the flue penetration.
- Add side soakers or step flashings as courses progress.
- Form a back gutter or saddle to divert water around the flue.
- Finish with clips, sealants, and compatible fixings.
5) Sizing and Installation Tips
- Measure flue outer diameter and choose a flashing cone range that fits snugly.
- Use butyl tape under the base and high-temperature sealant at the cone.
- Always allow for movement; never seal the flue rigidly to the roof deck.
- Photograph and document every installation for warranty and inspection.
6) Roof Penetrations and Flashings: Common Mistakes
- Using standard sealant instead of high-temperature versions.
- Failing to chase lead properly into masonry joints.
- Blocking water channels under tiles or slates.
- Incorrect boot sizing leading to leaks or tears.
7) Shop Flashings and Services
For Scotland-based installations, visit our franchise partner Hot Box® Dundee. For chimney sweep and inspection bookings, see Chimney Sweep or The Stove Guys.
8) Final Thoughts on Roof Penetrations and Flashings
Effective roof penetrations and flashings are essential to the success of any log burner flue system. By combining the right materials, correct detailing, and expert installation, you’ll achieve a watertight and durable finish that lasts for decades.
Explore the full Hot Box® product range below and discover why we’re the UK authority on roof flashings and flue detailing.

 Stoves
 Bio Ethanol Fires
 Beams
Beams Fireplace Surrounds
 Hearths
 Fireside Services
 Logs For Wood Burner
 Outdoor Living
 Instant Quote
 Contact Hot Box®